Elastic Search On AWS with Spring boot and Angular
As a follow-up of my previous post where we setup a spring boot application integration with elastic search, the next goal is to deploy the entire stack including the backend (i.e Elastic search and Spring boot application) as well as the front-end (Angular application) on AWS.
Please refer to the blog post and the source code (including front-end) for further details.
Pre-requisites
- AWS Account (free- tier should be sufficient)
- Sample applications along with sample elastic search index jsons (all available in the above mentioned source code).
Step 1: Creating Elastic search domain on AWS
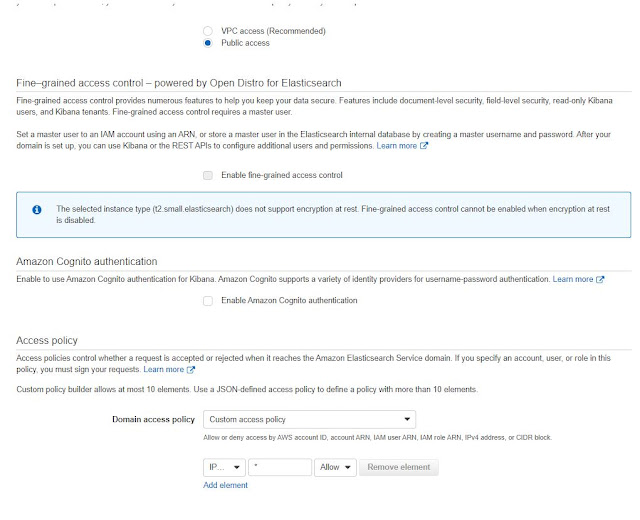
- Create an elastic search domain on AWS and assign the following access policy so that the elastic search has a public access:
Initially provide it with public access as follows:
- Create Index document using Postman:
URL:<url of elastic search domain created above>/employee_index?include_type_name=true
Method: PUT
Header: Content-type:application/json
Body: <copy content of the employee_index.json>
The elastic search on AWS comes with a default set of pre-installed plugins which includes support for phonetic search. Hence we do not require to install the phonetic plugin again as we had done for local elastic search( in the previous blog post)
Step 2: Spring Boot Application Deployment
The easiest way to deploy a spring boot application on AWS is using Elastic bean stalk.
Elastic bean stalk provides an option to deploy the spring boot application with an executable jar file.
- Download the backend source code.
- Modify the application.yml in the resources folder to set the correct elastic search host:
port: ${SERVICE_PORT:5000}
Elastic bean stalk has a default port of 5000.Hence we use it. Other option will be to pass the port as a jvm argument.
- Build the backend locally with maven using mvn clean install -DskipTests=true
- Create an application on elastic bean stalk and upload the jar.
- Once deployed, you should be able to access the swagger endpoint with the following url:
<URL on Elastic Bean Stalk dashboard>/swagger-ui.html
Alternative:
If you do not want to use elastic bean stalk, the other option is obviously to do it manually.
Create a new EC2 instance and SSH to it.
Install Java 8 and set it as default
#Installs java 8
sudo yum install java-1.8.0-openjdk
#make java 8 as default:
sudo alternatives --config java
and select the number associated with java 8
#verify default java version
java -version
Then copy the jar file to the EC2 machine with some tools like WIN SCP and then run the jar using java -jar command.
Once the Spring boot application is deployed either via EC2 or Elastic bean stalk, you can modify the access policy of the elastic search server to allow access only using ip address of the EC2 instance.
{
"Version": "2012-10-17",
"Statement": [
{
"Sid": "",
"Effect": "Allow",
"Principal": "*",
"Action": "*",
"Resource": "<arn of elastic search server>/*",
"Condition": {
"IpAddress": {
"aws:SourceIp": "<ipv4 address of ec2>/32"
}
}
}
]
}
Step 3: Angular Frontend deployment
Frontend frameworks like Angular / React and other single page applications can be easily deployed on AWS using S3 buckets's static web hosting feature.
The following steps are involved in deploying our frontend application:
- Download the frontend source code (employee-,management-app folder).
- Modify the backendBaseUrl property in src/environments/environment.prod.ts to point it to the url of the spring boot application
- Assuming that angular cli and npm are already installed, run the following command after navigating to the root folder of the ui application:
npm install
ng build --prod
The above command creates a dist folder which is the content which we will upload in S3.
- Create a S3 bucket and provide in full access with the following bucket policy:
{
"Version": "2012-10-17",
"Statement": [
{
"Sid": "AllowPublicReadAccess",
"Effect": "Allow",
"Principal": "*",
"Action": "s3:GetObject",
"Resource": "<Add ARN of the S3 bucket here>/*"
}
]
}
- Navigate to the created s3 bucket and enable static web hosting by clicking on Properties->Static web hosting.
- Upload the contents of \dist\employee-management-app folder in the s3 bucket
 |
| Add caption |
- The frontend application can be accessed by accessing the url provided in the Properties->Static web hosting section.
For further reading: AWS S3 Static web Hosting.


Comments
Post a Comment